Judy

Welcome to Recipes For Judys' Foodies
Saturday, December 31, 2011
Happy New Year
Happy New Year from me to all of Judys' Foodies EVERYWHERE! May the new year be one filled with LOVE, PEACE, FAMILY, FRIENDS & GOOD FOOD shared with loved ones!
Ginger Applesauce

10 Medium sized apples very ripe is best & I used Gala Apples any good cooking or eating apple will be fine.
2 TBS Butter
1 12 OZ Can of Ginger Ale
1/4 TSP grated Ginger or Powdered Ginger fresh grated best!
Peel Core & slice apples. Saute them in the butter with the ginger until soft. Pour in the ginger ale & let cook until completely soft. Mash with a potato masher right in the pan. Spoon into a bowl & serve warm or cold. Great with pork or ham ! No extra sugar needed
Amish Tomato Gravy from The Best of Amish Cooking Cook Book
1 Quart Canned Peeled & Chopped Tomatoes
3 TBS Flour
2 to 3 TBS Water
4 TBS Brown Sugar
Heat tomatoes to the boiling point. Meanwhile stir together the flour & water until smooth. Add stirring to the boiling tomatoes along with the brown sugar. Cook until thick. Serve over Mac & Cheese or Fried Potatoes. I never made this as I do not like my tomatoes sweet but I know that a lot of you do! If I were making this I would add a tablespoon or 2 of butter & a dash of salt along with parsley but the above is the original recipe. I would consider this stewed tomatoes & not a tomato gravy but among the Amish this is a Tomato Gravy.
Trying something NEW!
I am going to try something new with APPLES today! If it turns out delicious I will BLOG about it later ! Here's HOPING it works out like I think because it is a simple idea but different & sometimes they are the best !
Tomato Sauce for Pasta
2 large Onions Peeled & Chopped
4 Garlic Cloves Minced
2 TBS Olive Oil
2 Large Cans Chopped Tomatoes ( approx. 2lb sized cans)
1 14.5 OZ Can Tomato Sauce
1 TBS Italian Seasoning
1 TBS Parsley Chopped (Fresh is Best but dried ok)
Sugar to taste
Any or all of the following as you choose
1 Green Pepper Chopped
1 Cup Sliced Fresh Mushrooms
1 lb Ground Beef
1 Cup 1/2 & 1/2 Cream
Saute all the vegetables, except your canned tomatoes, in the oil until they are of soft. IF using beef saute that with the veggies & drain then put back into the pot. Now add all the following ingredients EXCEPT the sugar & the cream, DO NOT drain the tomatoes. Cook & stir over medium low until you have a nice thick sauce. Stir every 10 to 15 minutes do NOT let this stick on the bottom of the pan. You may do the cooking over medium low in the crock-pot. On the stove top cook at least 2 hours in the crock-pot cook about 6 hours. Once nice & thick taste & add sugar to suit add a tablespoon stir & taste until you get it right! Now stir in the cream if you want a creamy tomato gravy. I switch this up all the time adding veggies or not using meat. The cream gives this sauce a whole other flavor from the norm & I use that for a more elegant sauce. I am not a huge fan of salt or pepper but if you like than add that as well! Have fun playing with this sauce it is practically fool proof! Just do not let it scorch or it will be ruined!
Wednesday, December 28, 2011
Flourless Chocolate Cake "The Beast"

THE BEAST is the perfect name for this BLACK AS MIDNIGHT chocolate perfection confection! Silky, rich with subtle hints of coffee in its' depths. This cake is exactly what New Years Eve demands for dessert! This is why I am blogging this just for you in time for your New Years Eve Celebrations ! This BEAST will KNOCK YOUR SOCKS OFF ! But its' looks are deceiving this BEAST is a PUSSYCAT to make! My BEAST is a version of the recipe on Epicourious!
 |
| The Beast with melted chocolate drizzled over the top! |
1 Cup Strong Coffee
1 Tsp Vanilla
3/4 Cup Granulated Sugar
1 stick + 1 TBS Butter
18 Ounces of Semi Sweet Chocolate ( I used a 62% Cacao bittersweet chocolate) WARNING if you are LEARY of the INTENSITY of this chocolate just use a SEMI SWEET & not a high Cacao like I did.The darkness of the flavor from high cacao is NOT for the timid! IF you use a high cacao chocolate you MUST serve the dollops of whipped cream to help cut the bitterness of the cacao. IF you LOVE a good rich dark chocolate the high cacao is the ONLY way to go on this cake ! The coffee & vanilla help enhance the chocolate experience of THE BEAST!
6 Large Eggs


Mix the 1 Cup of Strong Coffee, vanilla & the sugar in a saucepan heat to boil. Simmer for 5 minutes. Let cool. In a deep saucepan melt the butter add chocolate & melt on low whisking to smooth. Let cool.Once COOL whisk in the sugar coffee syrup. Whisk smooth. Beat eggs with your whisk & whisk into the chocolate coffee sugar syrup. Whisk smooth ! Pour into your prepared pan. Place the pan in a deep roast pan that allows your cake pan to sit flat on the bottom inside the roasting pan. Fill the roaster with HOT WATER so that it comes 1/2 up on the outside of the spring form pan .

Bake in a 350 degree preheated oven. Bake until THE BEAST is set about 50 minutes. Lift the spring form pan out of roasting pan water bath & let sit to cool completely. Once completely cool remove THE BEAST from the pan by running a knife along the edge then release the spring lock. Invert on platter & carefully peel off the bottom of your pan and the parchment paper. Cover THE BEAST with the following Chocolate Ganache.
CHOCOLATE GANACHE
1 Cup Heavy Cream
8 Ounces Semi Sweet Chocolate ( The same kind used in making THE BEAST)
Heat heavy cream until simmering whisk in small pieces of chocolate until melted & all is incorporated. Whisk smooth & then cool to room temperature then pour over THE BEAST. Cover & refrigerate until ready to serve. Serve cold! Serve with a dollop of lovely whipped cream! SERVES 16 !!!! A little goes a VERY LONG WAY!!! This cake will earn you a STANDING OVATION & it is really not hard at all to make, but you do not need to tell that to your guest!

I hope you ENJOY THE BEAST as much as we do ! Chocolate lovers certainly will !
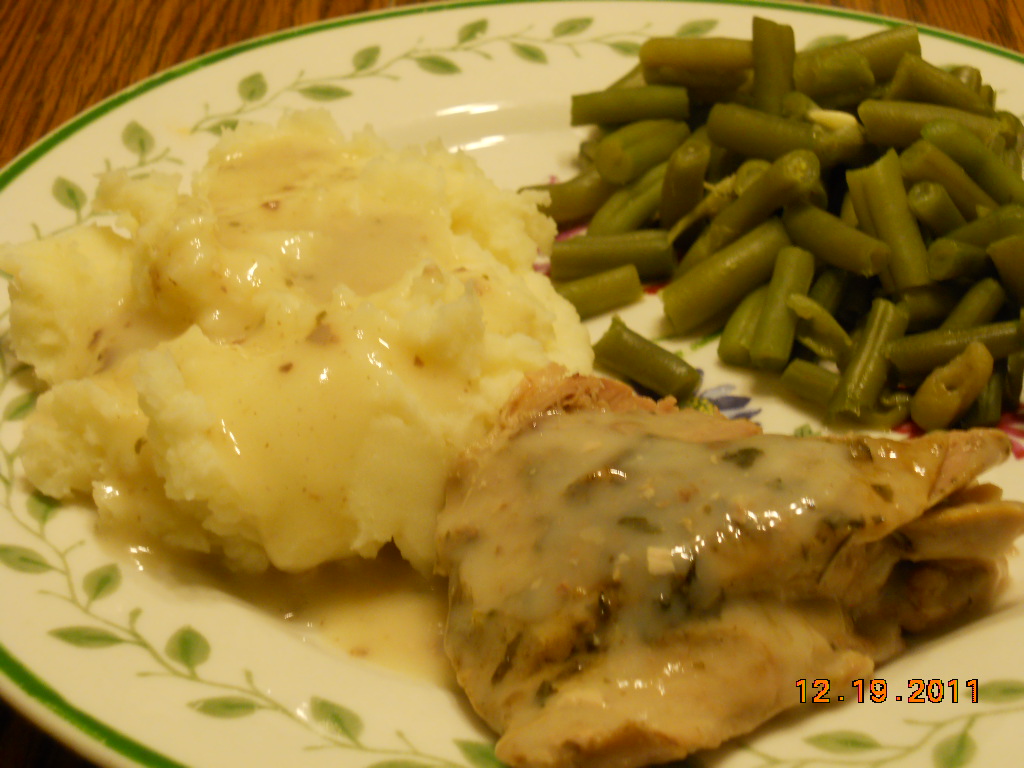
Pork & Sauerkraut for New Years Day !
This traditional dish is a MUST for all of the true Pennsylvania Dutch! Tons of Sauerkraut, Pork, Mashed Potatoes & Applesauce will be cooking all across Dutch Country on new Years Day! Including my house! The following is how I make this wondrous meal. We not only eat this "For Luck" on the first day of the new year but all year long because of how tasty & easy this is to make. Maybe this will become a tradition for you household too! DIG IN to some Pork & Kraut it is one of our BEST dishes!


My parents are coming over for SOME GOOD LUCK!
1, 4lb Pork Picnic Roast removed from its' netting!
4lbs of Sauerkraut ( I used bagged not commercial canned but homemade canned is GREAT!)2 Large Onions peeled & sliced
4 Apples quartered with core removed leave peel on
Brown pork in a large skillet ( helps to remove extra fat & adds great flavor. ) Brown to get a nice crispy browned outer color about 15 minutes of frying time. Remove from pan.
In a large roaster lay kraut evenly on the bottom. Lay pork in center on top of the kraut. Sprinkle onions over the top of the kraut. Lay apple pieces evenly around the surface peel side down. Cover roaster & bake in 325 degree oven for 3 & 1/2 hours uncovering the last 1/2 hour. Check on your pork & kraut about every 1/2 hour IF it looks dry add water to just keep moist, you probably will not need to do this but you do want juice so keep the mixture moist! Once roasting time is done remove pork & slice into serving pieces IF it falls apart that is PERFECT ! We serve this on a huge deep platter with kraut on the bottom with pork pieces & onions on top discarding the cooked apple ! Serve this with lots of mashed potatoes ( my recipe is on this blog as whipped potatoes!), side dish of applesauce is also a MUST & lots of potato dinner rolls (recipe on this blog for homemade rolls!), for dessert try shoofly pie, shoofly pie whoopie pies, pumpkin pie or lots of those Christmas cookies you might have leftover ! Of course all of these recipes are on my Blog! This is one of my families FAVORITE MEALS next to Thanksgiving ! The above Pork & Kraut may be assembled, after browning your roast, in the order given into your crockpot & cooked on low all day at least 6 hours but 8 is even better ! This dish is suppose to bring you GOOD LUCK for the entire NEW YEAR!
Monday, December 26, 2011
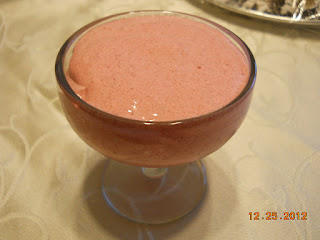
A Very Berry Merry Jay ! Recipe by Jay Eckman

2/3 Part Layer Cake we used Malbec or you may use a dry red wine!
1/3 Part Ginger Ale
1 Shot Blackberry Brandy
Mix, Stir & serve on the rocks!
Sunday, December 25, 2011
Christmas Goodies all ready for Foodies!


Saturday, December 24, 2011
MERRY CHRISTMAS
MERRY CHRISTMAS to all of Judys' Foodies & Happy Hanukkah too!
May your CELEBRATIONS be JOYOUS & the FOOD FABULOUS!
May your CELEBRATIONS be JOYOUS & the FOOD FABULOUS!
Thursday, December 22, 2011
Cranberry Mousse & Williamsburg Orange Cake by Linda Palmeri
I do not have a photo of the cake recipe Linda Palmeri has given to me as I have not had time to make it. She was so kind to share her wonderful recipes with the Foodies here at Judys Foodies & they would be great for this time of year so I am going ahead & posting the two she has given to me. Here is Linda's Cranberry Mousse & her Williamsburg Orange Cake !
 This is such a pretty accompaniment for any dinner but especially nice at holiday feast. This is crisp & tart with cranberry flavor but light & fluffy with just the right amount of sweetness! My family gave it RAVE REVIEWS!
CRANBERRY MOUSSE:
1. Can Cranberry Juice Cocktail
1. 3 oz. Package Raspberry OR Strawberry Jello
1. Can Jellied Cranberry Sauce
2 Cups Cool Whip Non Dairy Topping
Boil juice & stir in jello. Whip Cranberry sauce at high speed in a small bowl for one minute. Stir in the juice jello mix. Refrigerate until it begins to set up. Stir in Cool Whip & refrigerate until it has completely set. Linda suggests spooning into individual pretty serving bowls before it sets up !
WILLIAMSBURG ORANGE CAKE:
2 & 1/2 Cups Flour
1 & 1/2 Cup Sugar
1 & 1/2 Tsp. Baking Soda
3/4 Tsp Salt
1 & 1/2 Cups Buttermilk
1/2 Cup Butter Softened
1/4 Cup Shortening
3 Eggs
1 & 1/2 Tsp Vanilla
1 Cup Golden Raisins Chopped
1/2 Cup Finely Chopped Nuts
1 Tbs Grated Orange Peel
Preheat oven to 350 Degrees.
Grease & flour a 9x13 pan or two 9 inch pans or three 8 inch pans. Beat all ingredients together in a large mixing bowl on low, scraping sides of bowl constantly for 30 seconds. Beat on high speed for three minuts scraping sides of bowl every now & then. Divide into pans or smooth evenly in the 9x13 pan. Bake about 45 to 50 minutes or until toothpick comes out clean when inserted. Layers might only take 30 to 35 minutes. Cool & frost with the following frosting:
WILLIAMSBURG FROSTING:
1/2 Cup Butter Softened
4 & 1/2 Cups Powdered Sugar
4 to 5 Tbs Orange flavored liqueur or Orange Juice
1 Tbs Grated Orange Peel.
Beat butter & sugar together. Add Orange Liqueur & peel & beat.
Linda states at the bottom of her recipe that she loves to decorate the top of this amazing cake with holly leaf & berries! ENJOY FOODIES! When I have some time I am going to make this they sound SCRUMPTIOUS!
Lemon Raspberry Bars

I LOVE Black Raspberries & I always enjoyed Lemon Bars with their Shortbread crust so why not combine two flavors that would work nicely together? I have been making these for years now at Christmas time & yet I almost forgot to make them this year, HORRORS ! I scurried around and luckily these are a quick baking item and I made them in the nick of time! These are scrumptious, fast & very pretty with their beautiful color contrast and snow white powder sugar dusting. I hope you like these as much as we do !
CRUST:
1 Cup Butter
2 Cups Flour
1/2 Cup Powdered Sugar
3 Drops of Lemon Extract
Preheat Oven to 350 Degrees.
Mix altogether until you get fine crumbs, cut the butter in like you would for pie crust. Pat into a 9x13 pan pressing firmly to form a good base crust. I like to press this up the sides as well. Bake 15 Minutes. Remove from oven. Immediately, carefully spread with the a 10 oz. jar of Seedless Black Raspberry Preserves. I use my homemade but any store brand like Polaners or Dickinsons seedless jams are wonderful for this. You may use seedless Red Raspberry Preserve if you wish! Do this while the crust is hot so the jam will melt & make for easier spreading, be careful not to press down the crust will rip! I use a the back of a soup spoon for this it works very well. Now mix up the following lemon layer.
2 Cup Granulated Sugar
1/4 Cup Flour
1 Tsp Baking Powder
Juice from 2 Large Lemons almost 1/2 Cup just a little short of the 1/2 Cup mark ( not crucial on this)
4 Eggs
Stir together all of the dry ingredients. Add eggs & beat with mixer until nicely blended. Slowly beat in the lemon juice & beat until thick and a light lemon color. Pour over the Raspberry Preserve layer & bake about 25 minutes or until set & not jiggling ! Remove from oven & let cool completely. Once cool dust liberally with powdered sugar and cut into squares. Serve ! If not serving right away I refrigerate to keep !
Wednesday, December 21, 2011
Pickled Red Beet Eggs AMISH STYLE !


3 15 oz. Cans of Sliced Beets
1 Dozen Hard Boiled Eggs Peeled. Use eggs that you buy 2 weeks in advance so you have perfect peeled eggs! Fresh eggs will rip when you try to remove the shells. ( I bring my eggs to boil on high covered in water . Start timing as soon as you have the heat on & let cook boiling 20 minutes start to finish. Let cool before peeling.)
2 Cups Granulated Sugar
2 cups Vinegar
Place beets & eggs in a deep container that has a lid. Bring beet juice, sugar & vinegar to a boil stirring at first in a saucepan. As soon as the sugar is melted just let it comes to a boil no need to stir. Once it comes to a boil remove from heat & pour it over your eggs & beets. Let cool a bit & then cover & refrigerate. Stir these twice a day so your eggs are tinted evenly. These will darken & become that GORGEOUS color they are famous for! A wonderful SWEET & SOUR pickled egg & beet! We love to serve these sliced in half on one of our decorative egg plates so you may see the beautiful purple tinted egg white in contrast to the bright yellow egg yolk! I will post that picture on this recipe after mine have had their time to transfer from this to that !

Chocolate Marshmallows

At the holidays I get on a Marshmallow kick & I always wanted to play around with flavors. I decided to try a Chocolate Marshmallow. These are chocolatey & with almond flavoring & a dusting of powdered sugar & cocoa. Soft & decadent in MARSHMALLOW LUSHNESS these are IT! I cut one open so you could see the marshmallow center. ENJOY !
3 Packets of Knox gelatin
1/2 Cup of cold water
Whisk the water & gelatin together in a very large deep bowl & let sit 1/2 hour.
Next step:
Blend together 1 Cup Powdered Sugar & 4 Tbs, Cocoa. Butter a 9x13 pan or smaller pan for Marshmallows with height . These are from a 9x13 pan . Once your pan is buttered coat with a dusting of the sugar & cocoa mix. Save the remaining mix for coating tops & sides of the marshmallows.
Cooking :
In a VERY DEEP pot place all of the following ingredients.
1 & 1/2 Cups Granulated Sugar
1/2 Cup Cocoa
1 Cup Light Corn Syrup
1/4 tsp Salt
1/2 Cup Water
2 Tsp Almond Flavoring added to the mix as your beating the marshmallow! If you are not into almond use vanilla Extract ! ( I LOVE chocolate almond so that is why I chose it, use what you prefer, could be mint too!)
Cook over low heat until sugar & cocoa are melted. Whisk while doing this. NOW LET THE FUN BEGIN! Cook over high until mixture comes to 244 degrees. This will come up very high in the pan so do not be alarmed. DO NOT STIR during this process! You will be tempted & you might even think the mixture is burning IT ISN'T ! Let her go & boil baby boil ! As soon as mixture is at 244 degrees remove from heat ! 244 degrees is firm ball test in a cold glass of water. If you do not have a candy thermometer just drop a small blob of the candy mixture into the cold water. If the blob turns into a soft but definite firm but soft ball EUREKA that's IT !

Tuesday, December 20, 2011
Baked Mexican Ziti

1/2 Lb Ziti made per package & drain but keep the pot to cook your meat.
1 Lb ground beef or ground turkey or ground chicken ( I use turkey) + 2 TBS of oil for browning if NOT using beef. If you use beef drain off extra grease before adding seasoning & frozen vegetables
1 Lb Bag of Frozen Peppers & Onion Vegetable Mix
1 16 oz jar of your favorite Salsa
Chili Powder to Taste
2 Cups Mac & Cheese Shredded Cheese Blend or your favorite Shredded Cheese.
6 Large Handfuls of your favorite Tortilla Chips lightly Crushed NOT FINE !
Spray a 3 & 1/2 Quart Casserole Dish. Preheat oven to 350 degrees. Brown burger, seasoned with the chili powder, in the same pan that you boiled your noodles. Add the frozen vegetables & cook until tender. Stir in salsa.Add the ziti to the pot & stir to combine. Pour everything into your prepared casserole dish. Spread 1/2 of the crushed tortilla chips over the top then the shredded cheese then top with the rest of your chips sprinkled evenly over the cheese. Bake for 1/2 hour until cheese is melted & bubbling !

VARIATION ! You made add a 1lb bag of frozen Mexican corn mix to this dish; or even a can of black beans for even more flare. Tonight I just wanted the plainer version ! When it is summer time I use fresh green peppers & sweet onions but in the winter I use the frozen or when I am short on time.I sometimes make this with rice instead of the noodles too ! You want about 6 servings of cooked rice ! This dish tastes great any way you choose to make it!
Monday, December 19, 2011
Roast Turkey Thighs Done in the Crock-pot with a Cream Gravy !

3 Medium Turkey Thighs with Bone in & Skin On !
1 Tsp Salt
2 Tbs Parsley Flakes
1 Tbs Minced Onion Flakes
1 Tsp. Ground Sage
Pepper to taste
Lay turkey thighs in crock-pot skin side up. Sprinkle with all of the seasonings. Cook on low 6 hours. Remove turkey from crock-pot & make the following gravy. Allow 1 Turkey Thigh per serving!
CREAM GRAVY:
2 Tbs Cornstarch
1/4 Cup Half & Half
Stir Half & Half into cornstarch whisking out all lumps. Now whisk this into the drippings in the bottom of the crock-pot. Whisk & cook in high until thick about 2 minutes. Return turkey to the crock-pot & keep warm until you are ready to serve ! makes about 1 & 1/2 Cups of gravy , perfect for those mashed potatoes!
So much better tasting & HEALTHY for you than all those frozen dinners that seem innocent enough to eat night after night. But it doesn't get easier than this & this way YOU control the salt & the fat content that so many of the GOOD TASTING FROZEN dinners pile into one of their meals. This costs less, is healthier for you AND you have enough leftover for a couple of Hot Turkey Sandwiches made from reheating the leftover gravy & adding the remaining turkey or have a cold turkey sandwich the next day. Either way YOU WIN !
Date Pinwheel Cookies with Peanut Butter & Oats!

Cookie Dough:
1 Cup Butter
1 Cup Brown Sugar
1 Cup Granulated Sugar
3 Eggs
1 Tsp Vanilla
4 cups Flour
1 Tsp Salt
3/4 Tsp Baking Soda
Soften the butter then beat with mixer until creamed. Add sugars & beat. Add eggs & vanilla & beat again. Sift all dry ingredients together. Now slowly add a few cup at a time into your butter mixture beating each time before adding more. Chill the dough ! Overnight is best but at least 4 hours !
Date Filling:

1 & 3/4 Cups water
1 Cup Sugar
1 Cup Chunky Peanut Butter ( not my homemade use a store bought)
1 Cup Rolled Oats or Oatmeal, just not instant!
2 Tsp Vanilla
2 Dashes of Salt
Place everything in a deep saucepan & cook over medium high heat on the stove top. Stir the entire time. Cook until thick & mixture turns a clear deep brown color. It should be bubbling. BE CAREFUL that it does not stick to the bottom of the pan. It will have the tendency to do so, just stir from the bottom & turn heat down a bit if you need. Once it has thickened & cleared in color, remove from heat & let come down to room temperature . Once room temp. get your dough out !
Making the Pinwheel Rolls :
Divide dough in 1/2. Take one 1/2 of the dough & place on a well floured surface. Roll out into a rectangle about 1/4 inch thick 8 inches wide & about 15 inches long. Smear the surface with 1/2 of your date mixture spreading out over the surface of your dough. Be careful not to press to hard or the dough will rip. I have found using a frosting spreader & my fingers work well together to spread the filling out over the dough. Roll up like a jelly roll so you have one long log of cookie ! I then cut the log in 1/2 place on a plate & cover with plastic wrap & refrigerate. Now prepare the remaining dough the same way. Refrigerate cookie logs 4 hours but best overnight!
BAKING :
Spray cookie sheets with baking spray or grease lightly. Uncover one roll at time while leaving other rolls in the refrigerator to stay chilled. Preheat oven to 375 degrees. Slice as thin as you like I made mine a little under a 1/4 inch thick & got 15 cookies per logs . Lay cut side down on cookie sheet & bake 8 to 10 minutes OR if your oven is slow about 13 minutes like I had to do ! Remove from sheets & let cool. Store in an airtight container ! This made 60 Pinwheels !
Sunday, December 18, 2011
todays Endevours in the kitchen ...


I also made a batch of my Date Pinwheel Cookies. These must chill overnight before baking so I will post the results tomorrow. Just a hint these have very different ingredient from the usual Date Pinwheels that you might find elsewhere. Check back to see these delicious and pretty cookies !
Thursday, December 15, 2011
Follow Judys Foodies now on TWITTER!
JAEU2
You will get all the latest notices of each recipe ! You will NOT want to miss a SINGLE one !
Wednesday, December 14, 2011
Please vote !
Please go to "THE FOOD CHANNEL" on Facebook or their Web page & go to their COOKIE SWAP contest. Click on VOTE on my Shoofly Whoopie Pies to VOTE FOR ME ! THANK YOU, Judy from JUDYS FOODIES!
Party Mix Made EVEN BETTER !

Sweet & spicy party mix the best party staple for those Holiday parties & sports on TV! I really gave this an overhaul to LIGHTEN this old favorite so you may indulge without all the guilt! I substituted all that butter or margarine with EGG WHITES ! Whooo Hooo & EASY TOO ! SNACK ON FOODIES!
6 Egg Whites3 & 1/2 TBS Water
1 TBS Worcestershire Sauce
6 Dashes Red Pepper
4 TBS Season Salt
2 TBS Onion Powder
4 TSP Ground Mustard Powder
2 TBS Garlic Powder
2 TBS Hungarian Sweet Paprika
1/2 Cup Sugar + White Sanding Sugar for sprinkling
4 TBS Parsley Flakes
14 oz. Rice Chex Cereal
14 oz Wheat Chex Cereal
14 oz Multi Bran Chex Cereal
1 LB Roasted Unsalted Peanuts
2 Cups Roasted Mixed Nuts
2 Cups Unsalted Sesame Stix
1 LB Thin Pretzels Sticks
Coarse Sea Salt to Sprinkle
Sanding Sugar to Sprinkle
In a mixing bowl beat egg whites & water until frothy, just enough to break down the egg whites. Add all of your spices & flavorings & beat again to get a froth. In a LARGE pan or deep bowl dump in all of your cereals, nuts, pretzels & sesame stix. Stir to mix them . Now beat once more your egg mixture to froth up & pour this over your cereal mixture. Stir well & gently to coat everything. Bake in a 350 degree oven stirring every 15 minutes or so on 4 deep edged baking sheets . Bake until dry & nicely toasted. We like this dark so I bake this about an hour or longer . You might want to only bake this 35 minutes up to an hour to just nicely toast.Check at each stirring & if this is as dark as you like & cereal is toasted & dry remove from oven. Dump out on to a foil covered surface & sprinkle each sheets batch with a sprinkle of Coarse Sea Salt & White Sanding Sugar, let cool completely before storing in an airtight container ! This makes about 30 Cups of SNACKING JOY !
Judys' Foodies Hot Crab Dip

2, 8 oz. Cream Cheese Softened
8 oz. Sour Cream
4 Tbs. Mayonnaise
1 Tbs Lemon Juice
2 Cups Shredded Mild Cheddar Cheese
1 Tsp Crushed Garlic
1 Finely Minced Small Onion
1 Tsp Prepared Yellow Mustard
1 Tsp Worcestershire Sauce
1 Tbs Old Bay Seasoning (or to taste, we like more)+ more for on top
1 Tsp Horseradish grated ( I use from a store bought jar)
1 Tbs Parsley Flakes + more for on top
1 Tsp Paprika + more for on top
1 Can 1lb. LUMP Crab Meat ( Must be Lump)
Cream the softened cream cheese with the sour cream & mayo. Beat in everything EXCEPT the Cheese & Crab. Beat till well combined. Now stir in by hand the cheese mixing well. GENTLY FOLD IN the crab meat trying to not break up the nice large pieces. Fold in well. Butter a nice deep casserole dish. Gently spoon crab mixture into the dish. Sprinkle the top with parsley flakes, more Old Bay & paprika. Bake in a preheated 350 degree oven for 45 minutes. Serve piping hot with hot crusty bread pieces or a very good cracker! HEAVENLY !

You may make this in a buttered crock pot cooked on low for 4 hours & it will still be HEAVENLY !

Tuesday, December 13, 2011
Hersheys' Chocolate Symphony Cookie

1 & 1/3 cup Shortening
1 & 1/3 Cup Softened Butter
2 Cup Granulated Sugar
2 Cup Brown Sugar
4 Eggs
3 Tsp Almond Extract, or 4 Tsp Vanilla you choose I wanted more almond flavor.
5 Cups Flour
1 Cup Cocoa ( I used Hersheys' Special Dark Cocoa Powder) if you like milk chocolate use regular cocoa!
2 Tsp Baking Soda
2 Tsp Salt
12 oz Chocolate Chips ( I used Semi-Sweet) if using regular cocoa use milk chocolate chips!
1 Cup Slivered Blanched Almonds
8 oz. Heath English Toffee Bits O' Brickle Bits
Cream Shortening with butter, add sugars & beat fluffy. Add eggs & flavoring & beat until light & fluffy. Sift flour, cocoa, baking soda & salt together. Slowly beat into your creamed mixture. By the time you get over half of the flour mixture beaten into the creamed you will have to stir in the rest by hand. Stir well until all is incorporated into the batter. Now stir in the chocolate chips, almonds & brickle bits. Distribute them evenly. Chill dough.
Preheat oven to 350 Degrees. Cover baking sheets with parchment if you prefer. I use parchment & love how the cookies slide off the sheets & you have amazingly easy clean-up! You may drop cookies right onto your cookie sheets if you wish. Bake between 10 & 12 minutes. Cookie should be lightly puffed up. Remove from oven & let cool on your baking sheets for a minute. Remove from sheet & let finish cooling ! This recipe makes 10 dozen medium sized cookies 3 inches across . You might wish to cut this recipe in half but I like to make big batches of good cookies to have plenty to give away & serve guest with a FEW left just for me ! Store in an airtight container. These keep very well !
Monday, December 12, 2011
Winter Fruit Salad

1 Ruby Red Grapefruit, peeled & sectioned
2 Navel Oranges, peeled & sectioned
1 Red Delicious Apple Cored & cut into bite sized pieces
1 Granny Smith Apple Cored & cut into bite sized pieces
12 Maraschino Cherries halved
12 Frozen Bing Cherries halved & pitted ( found in the freezer section in your store) I throw Bing Cherries in the freezer when they are in season, so GREAT to have them after their season is over.
1 Can Crushed pineapple including the juice
1/4 Cup of Smuckers Strawberry Topping
Prepare fruit add all ingredients into a bowl & CHILL !
Sunday, December 11, 2011
Iced Oatmeal, Pumpkin Raisin Cookies!

1 Cup Shortening
1 Cup Regular Sugar
1 Cup Brown Sugar
2 Eggs
2 Tsp Vanilla
1 & 3/4 Cups Pumpkin
1 Tsp Cinnamon
1/2 Tsp. Ginger
1/2 Tsp Cloves
1 & 1/2 Cups Flour
1/2 Tsp Baking Powder
1/2 Tsp Salt
3 Cups Old Fashioned Oats ( Regular Oatmeal is OK ) but I prefer the Old Fashioned Oats
1 & 1/2 Cups Raisins
Beat Shortening, add sugars & beat again. Add eggs, vanilla & pumpkin & beat again. Mix flour, salt, baking powder & spices together. Slowly add a little at a time to your creamed shortening mixture. Beat well. Stir in your oats & raisins. Mix well ! Chill dough.
Preheat oven to 375. Drop teaspoonful of dough on parchment covered baking sheets. Press dough down with the back of the spoon to flatten slightly. Bake 15 to 18 minutes until bottoms & edges of cookies are brown. IF you want larger cookies drop by tablespoonful & flatten slightly, Check at 15 minutes but you will probably have to bake a little longer. If you use teaspoonfuls you will get 6 & 1/2 dozen cookies. Drop by tablespoonfuls & you will get 4 & 1/2 dozen. Let cookies cool before you ice with one of the following icings!
VANILLA FROSTING:
3 & 1/2 Cups Powdered Sugar
2 Dashes of Salt
2 & 1/2 Tbs of Butter Melted
1 Tsp Vanilla
4 to 6 Tbs Milk
Melt butter, I microwave the butter for about 45 seconds on high. Stir all the dry ingredients together. Pour in melted butter & 3 Tbs of the milk. Stir with a spoon until smooth. Now add only enough milk to get a nice smooth somewhat thin icing. You want this about the smoothness of very thick molasses or honey. Drizzle over each cooled cookie. Frosting will harden when cooled. Store in an airtight container with wax paper between each layer !
CREAM CHEESE ICING
Use above ingredients except use 4 TBS cream cheese softened INSTEAD of the butter. Beat with a mixer. Spread on top of each cookie !
NEW RECIPE COMING TODAY!
NEW RECIPE COMING TODAY!
ICED OATMEAL, PUMPKIN, RAISIN COOKIES!
A cookie studded with raisins, lightly spiced, the GOODNESS of Pumpkin and a CRUNCH of Oatmeal!
DO YOU HAVE YOUR CHRISTMAS BAKING FRENZY ON?
I DO !
Don't forget to check out all the recipes available here at Judys' Foodies! There are over 130 DELICIOUS recipes !
My HOLIDAY Favorites so far are :
Shoofly Pie Whoopie Pies ****
Mocha Hazelnut Whoopie Pies ****
My Cousin Debs' Chocolate Chip Cookies ****
Sandtarts ****
Mrs. Fields' Peanut Butter Cookies ****
Sugar Cake Cookies (because of their unusual flavor !)
Iced Oatmeal Pumpkin Raisin Cookies, (because they are different & great!)
My Moms' Best Stuffing ( my family's must have!)
Chocolate Cake with Peanut Butter Frosting,
Coconut Cake, Jessica Spencers' Beautiful Apple Cake & The Waldorf Astorias' Red Velvet Cake, because these cakes are just stunning to present to your guest and they taste as great as they look! ****
Minnies' Rice Pudding
Rum Raisin Bread Pudding
Focaccia because it is great for a meal or as an appetizer.
AJ Cunninghams' "I like it smooth" Spaghetti Sauce , because it is easy, fast, versatile & OH SO WONDERFUL!
But I have over 130 recipes on this site & my 4* RECIPES might not be YOUR 4* Favorites! So take some time and browse the recipes all are DELICIOUS OR they would NOT be on Judys' Foodies!
I add about 3 new or even more recipes every week ! Please, if you are looking for a recipe & do not see it here leave a request & I will do my best to come up with a GREAT RESULT! If you have a GREAT recipe & would like to share it with me feel free to do so ! I would LOVE to try some of your recipes!
**** ( means this is one of my 4 star all time FAVORITE recipes!)
Saturday, December 10, 2011
Oatmeal Crumb Cake


We had this cake last night for Kevin in honor of his birthday. WOW! Great texture with 2 inches of crispy crumb topping for this cakes crowning glory ! The cake was moist, flavorful & gorgeous too!
4 & 1/2 Cups Flour
3 Cup Sugar
1 Tsp Salt
3/4 Cup Shortening
2 Tsp. Baking Powder
Cut the above together to make crumbs reserve 1 Cup to make your topping. To the remaining crumbs add
3 beaten eggs
2 Cups Buttermilk
2 Tsp Vanilla
1 Tsp Baking Soda dissolved in the buttermilk. Make sure your bowl for the buttermilk & soda is deep because it will foam up somewhat when you stir the baking soda into the buttermilk. Beat all of this together with a mixer until you have a nice smooth batter. Grease & flour a large bundt or angel food cake pan. pour the batter into the pan. Now take the reserved crumbs & cut in the following:
3/4 cup Flour
1/2 Cup Sugar
3/4 Cup Brown Sugar
2 Tsp Cinnamon
2 Tbs Shortening
1 Cup Oatmeal.
Cut until all crumbs are mixed well. Sprinkle over the cake batter. Evenly spread it over the top. Dot top of crumbs with bits of butter using about 4 Tbs. all together. Bake at 350 degrees for 45 minutes to 1 hour. Check with a toothpick to see if it comes out clean. If toothpick doesn't have wet crumbs & cake is springy to the touch remove from oven & let cool for about 1 & 1/2 hours. Run a knife along the outer edge & around the center hole. Invert onto a plate & then invert again so crumb top is on top. Serve warm or cold !

Helpful Holiday Substitutes For Your Recipes!

Some simple but forgotten recipe substitutes !
1. Buttermilk, use 1 tsp. lemon juice per 1 cup regular milk. Stir juice into the milk works the same as Buttermilk!
2. Sour Milk, 1 tsp vinegar per 1 cup milk. The vinegar will sour the milk!
3. Nuts, my family is not fond of nuts in baked goods. Replace with equal amount of oatmeal instead of the nuts!
4. Bakers Chocolate, if the chocolate is to be melted, use cocoa. Use 3 level tablespoons of cocoa powder with 1 tablespoon of oil stirred together. This will equal 1 ounce of baking chocolate!
5. Spices, if the recipe calls for a spice you do not like, replace it with one that you like. You will like the end result better because it is now made to your taste & not the recipes. Cinnamon, nutmeg, cloves, ginger are all interchangeable or may be left out all together.
6. Flavorings, same thing as above, tired of vanilla try almond extract or lemon or even coconut. Do not get stuck in a rut! Mix it up & wake up your taste buds! Look at all the choices in your baking aisle & give something different a try! There is even walnut, root beer, orange & maple flavorings , go ahead and try one instead of good old vanilla! Not that there is anything wrong with vanilla but the other flavorings are feeling neglected !
6. Flavorings, same thing as above, tired of vanilla try almond extract or lemon or even coconut. Do not get stuck in a rut! Mix it up & wake up your taste buds! Look at all the choices in your baking aisle & give something different a try! There is even walnut, root beer, orange & maple flavorings , go ahead and try one instead of good old vanilla! Not that there is anything wrong with vanilla but the other flavorings are feeling neglected !
7. Bread Crumbs, if you do not have bread crumbs & the recipe takes bread crumbs, crushed crackers will do the trick. If you have not tried Panko Crumbs for bread crumbs do so THEY ARE AWESOME! They make the BEST coating for chicken & fish !
Wednesday, December 7, 2011
Shoofly Pie Whoopie Pies ! My Original Pennsylvania Dutch Treat!

Cookie Part:
2 Cup Sugar
2 Cup Shortening
2 Cup Molasses
4 Eggs
8 Cups Flour
2 Tsp Baking Soda
2 Tsp Salt
4 Tsp Cinnamon
2 Tsp Ground Ginger
2 Tsp Vanilla
Cream Shortening, add sugar & molasses & beat again. Add eggs & vanilla & beat again. Sift all dry ingredients together & then slowly beat into your creamed mixture. You will end up stirring some of the flour mixture in by hand with a large spoon. It will be a soft dough & you will be able to do this easily. Chill dough overnight. To bake preheat oven to 350 degrees. Cover cookie sheets with parchment. One sheet of parchment will last throughout your baking ( no need to use a fresh sheet for each baking). Scoop at a ball of dough, I used my melon ball maker but a large tablespoon will do the trick. Roll dough into a ball about the size of a walnut. Beat 1 egg with 1 tablespoon of water. Dip the top of your cookie ball in the egg wash. Every other cookie ball you will dip into the crumb topping that will follow the Gooey Filling recipe. Place on parchment cover cookie sheet spread these far apart as they are a large cookie. After you have every other cookie dipped in its' crumb topping bake for 13 to 16 minutes, Cookie should be puffed up, lightly browned on top with browned bottoms. Remove from sheets & let cool COMPLETELY before filling & assembling!
GOOEY FILLING & CRUMB TOPPING:
1 Cup Flour
3/4 Cup Brown Sugar
1/4 Tsp Salt
1 Tbs Shortening
Stir dry ingredients together & cut shortening in to make crumbs. Use a fork & crush the shortening into the flour mixture in it will look like a sandy mixture. Remove 3/4 cup & set aside this is your crumb topping for dipping your cookie dough balls !
Now taking what is left after you removed your 3/4 cup crumb topping & place it in a deep saucepan. Stir in following:
1 Cup Molasses, again I used Grandmas
1 Beaten Egg
1 Tsp Vanilla
1 Cup Hot Water with 1 Tsp Baking Soda stirred in till dissolved
Stir all this together over medium heat. Using a whisk continue whisking as this cooks. This will look like foamy brownish water & then all of a sudden MAGIC HAPPENS! This will get thick and clear dark brown & bubble. Whisk & cook until all of the liquid is now thick goo! OH HEAVENLY MOLASSES GOO!
Remove from stove & chill overnight.
WHOOPIE PIE FROSTING:
2 Eggs Whites
1 Tbs Vanilla
4 Tbs Flour
4 Tbs Milk
4 Cups Powdered Sugar
1 Cup Shortening
1/2 Tsp Salt
Cream egg whites, vanilla, flour & milk together. Add 2 cups of the powdered sugar & beat again. Add 2 more cups of the sugar & the shortening & beat again. Beat until very fluffy. If you need you may add more milk or more sugar to get the desired spreading texture of this filling. I like mine somewhat stiff over soft because the cookie hold together better.
HELPFUL HINTS:
Make the dough, the goo & the frosting all the same day then the next day you can bake let cool & put pies together . Everything is already done & chilled & you only make a mess of your kitchen once!
You will have just enough of the goo I put about 2 tsp of goo on the bottom half of the whoopie pie. Then I put about 2 TBS of frosting on the top half & put the two together. Store in a very cool place or refrigerate until you are ready to serve these FUN COOKIES! I place mine in a large airtight tin with wax paper between layers & one soft piece of commercial white bread on the top layer. I store these in my garage where it is SUPER COLD or in the refrigerator but these will not last long ! This recipe makes 46 large Whoopie Pies ! You could make these smaller so they are more like a cookie but I wanted FABULOUS WHOOPIE PIES !!!
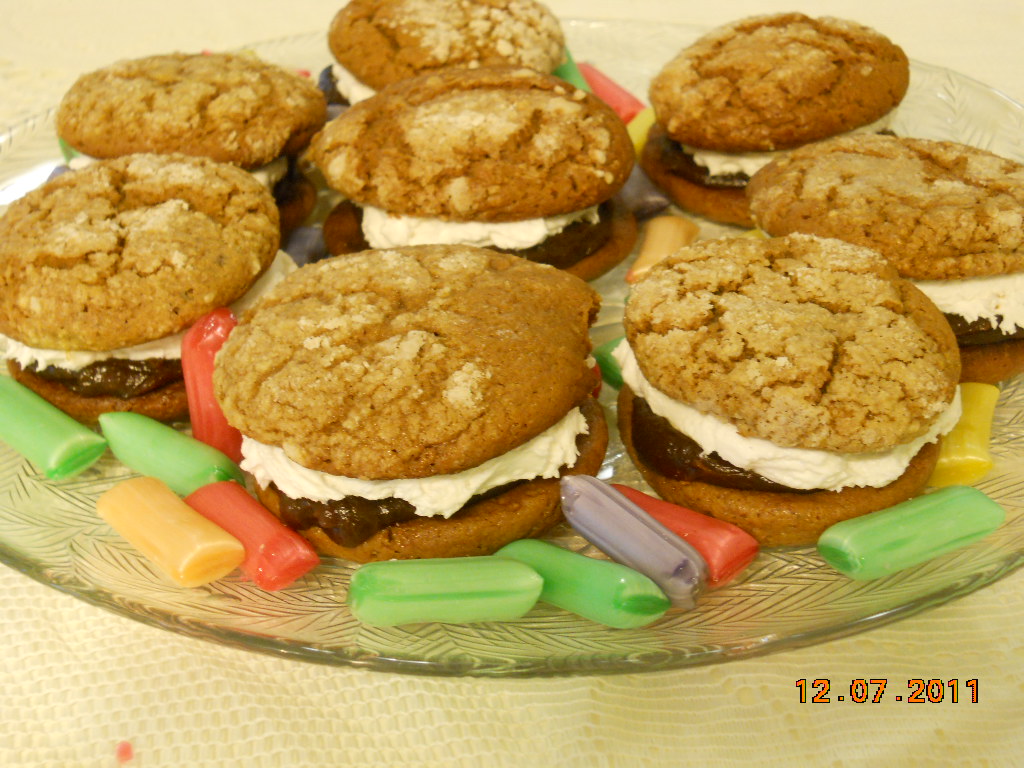
These Whoopie Pies FREEZE VERY NICELY TOO! Make them ahead for any occasion! I just whipped up a batch to take next week to my family reunion. Freezing them today & thawing them the day of the reunion!
Tuesday, December 6, 2011
Chicken Cheese Rotini

Hearty, warm comfort food, NOW THAT'S WHAT I'M TALKING ABOUT!
1 Lb Ground Chicken
1/2 Box Rotini Noodles cooked & drained, use pot to make sauce
2 TBS Olive Oil
1 large Onion Chopped
2 TSP Minced Garlic
1 Bag Frozen Italian Medley Vegetables
1/2 Bag Frozen Spinach
2 TSP Cajun Seasoning
1 Cup Onion Rings cooked or Durkee Onions
2 TBS Butter
3 TBS Flour
3 Cups Milk
2 Cups Cheddar Cheese shredded
Parsley Flakes
Brown Chicken in oil, add garlic, onion & saute until tender. Add frozen vegetables, spinach & cajun seasoning.Cook until vegetables are tender stirring often. Turn off heat & make your sauce.
In the pot you cooked your noodles melt butter, stir in flour. Slowly stir in milk making sure you whisk out any lumps. cook over medium high until sauce thickens. Now stir in cheese & cook until melted. Stir sauce into your meat mixture. Spray a deep large casserole dish & spoon mixture into the dish. Top with the onion rings ( I used the leftover onion rings from my Batter Up recipe from a couple of nights ago.) You may use some frozen onion rings just place those right on top of this casserole without precooking or use Durkee French Fried Onion Rings from the can! Any of these would be GREAT! Now sprinkle with parsley & bake in a 350 Degree oven for 35 minutes or until browned & bubbling. If you use frozen onion rings you will probably want to bake this for 45 minutes ! Serves 6 ! Great with crusty bread & a salad !

Sunday, December 4, 2011
Hard Pretzels Handmade at Home !

This recipe took many attempts but here they are FINALLY ! FUN to make too ! Enjoy your own Pretzels! I am adding this for your information, THESE ONLY KEEP FOR ABOUT 1 WEEK then lose that hard pretzel crispness! These are great for right away snacking but do not plan on storing these they will not keep.
1 & 1/2 Cups Warm Water
2 TSP Sea Salt
1 TBS Sugar
1 Yeast Packet
2 TBS Shortening
Stir warm water, salt, sugar & melted shortening together, Stir in yeast & set aside but make sure yeast has dissolved into the water.
4 & 1/2 Cups Flour. Add water mixture slowly beating with mixer or a food processor until you have a firm dough. I started with my mixer & then ended working the flour in with my hands. Cover & set dough aside to rise about 2 hours. It will not quite double in size.
Now the FUN BEGINS.
Mix together
2 Egg Whites beaten, with 2 TBS water & 2 TBS Baking Soda beat well !
Pinch off egg size pieces of dough one at a time & roll between your hands until you have an approx. 19 to 20 inch rope of dough. I used a twirling motion, pulled & stretched slightly. On your parchment covered baking sheet lay rope of dough out & twist into pretzel shapes. Brush the pretzel with the egg mixture at once & sprinkle with coarse sea salt ! Continue with all of the dough.

You will get exactly 12 pretzels! Bake in a preheated 425 degree oven until dark brown check at 20 minutes, if dark brown, lower the temperature to 350 degrees & bake another 20 minutes, lower the oven to 300 degrees & bake another 30 minutes checking at each step that the pretzels are not getting to brown. After they baked at 300 degrees TURN OVEN OFF but let pretzels cool COMPLETELY in the off but closed oven. You will have CRISPY BEAUTIFUL PRETZELS !
Subscribe to:
Posts (Atom)